How does a Window Catio or 3-Sided Catio attach to a building?Updated 4 months ago
3-Sided Catios, Window Catio Enclosures, and Towers all require attachment to a wall for necessary support. These types of enclosures are fabricated with one side left nearly completely open aside from a 6" wide strip of mesh that is used for attachment to the wall. As part of the installation process, this 6" wide strip is folded "in" and should rest flush against the wall.
For example, when planning the size of a window enclosure, it is generally recommended that the Length and Height of the enclosure be at least 12" longer and higher than the dimensions of the window itself (including any frame or sill). This provides a 6" wide buffer around all 4 sides of the window: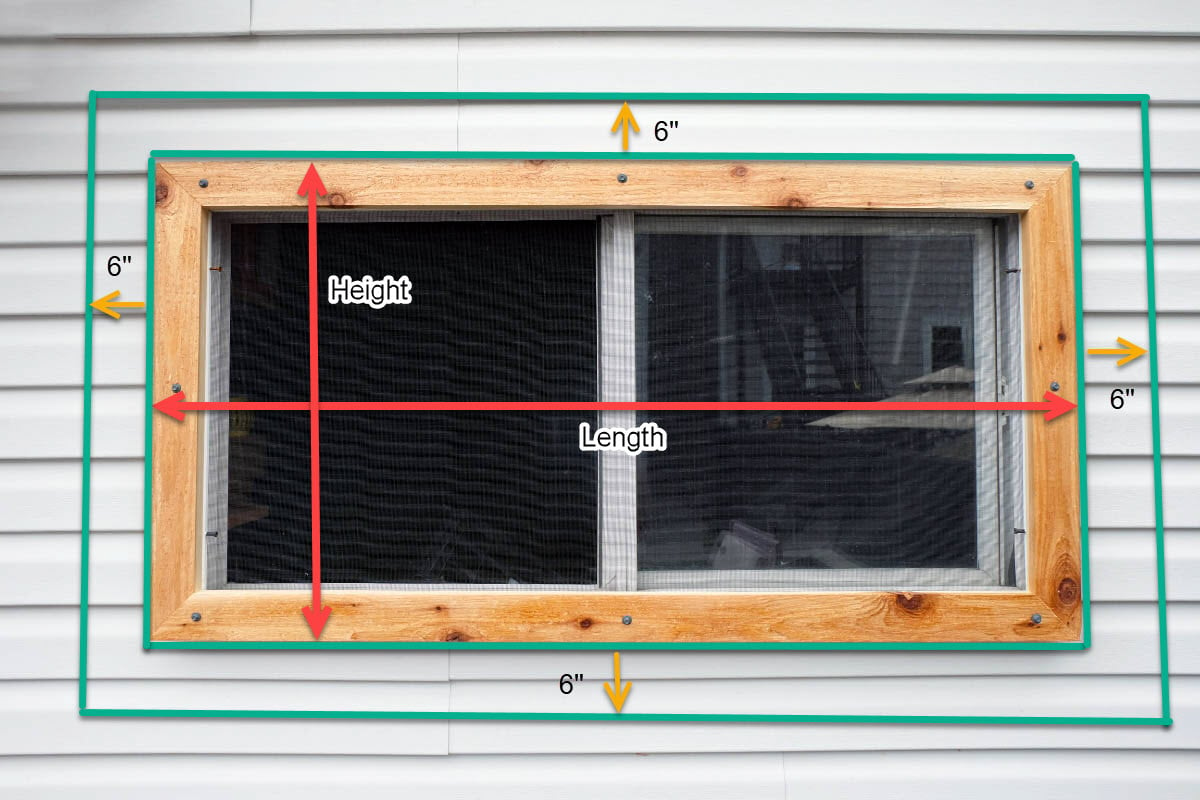
While this example is specific to a window enclosure, the same concept applies to 3-Sided Catios and Towers (if they are going to sit over a window, pet door, or any other obstacle on the house/structure).
Once in place at the desired location, fasteners are secured through that strip of mesh to "pinch" it tight to the house and secure the catio in place. We recommend a fastener in each corner, then spaced evenly along the sides. We recommend a fastener approximately every 2 feet, but they can certainly be spaced closer together if needed.
The type of fastener required will be dependent on the type of wall you are attaching to. These types of catios all include a Component Mounting Hardware Kit which includes fender washers and both wood screws and masonry screws. Masonry screws are recommended for concrete block or brick walls (pro tip: Align fasteners with a mortar joint to prevent long-term damage to the bricks themselves) and wood screws are recommended for other wall types that have a wooden inner structure (below the siding). Pair a fastener with a fender washer and secure it through the 6" strip of mesh at a point of intersection. This will ensure the washer grabs the wire mesh well to secure it in place.
After all the screws are secured, you may consider sealing them with an outdoor-rated silicone caulk to prevent water from seeping in.